How to Keep Moss Alive Indoors Long Term
How to keep moss alive indoors: light, humidity, and watering targets, a closed-setup routine, and fixes for drying, rot, and fade.
A daily misting habit is the routine many indoor moss owners start with, and the fastest way to confuse a green decoration with a living plant. Moss can hold color while it isn't growing, and look dull while it can still recover. Staying green for weeks is easy; surviving 30, 90, and 180 days takes numbers. To learn how to keep moss alive indoors for months, you need targets you can check, and a schedule you can measure.
Indoor Moss Targets That Actually Work
Moss can look healthy at month five and be gone by month six. That is roughly what happened in a 12-month indoor green-wall experiment, where moss held at 14–20 °C and 60–100% humidity with drip or spray irrigation of 300–1500 mL per day survived only about six months, light below 900 lux harmed growth while most species performed best around 2,000–4,000 lux, and open designs needed daily intervention to hold humidity around 75–96.5%, according to the 2025 ACM study of moss terrariums.
Read those numbers as hard limits. Across the entire irrigation range, extra water bought no extra months, so watering volume alone will never carry a struggling setup. Light and humidity are the levers that decide whether moss keeps metabolizing, and both have floors you can measure with cheap tools. An open dish can still work, but daily attention becomes part of the design rather than a backup plan.
Match the target to your container
Use one row at a time. Don't try to run an open tray on closed-jar watering, and don't run a closed jar on open-tray misting.
Indoor moss care targets by setup
| Factor | Closed terrarium | Open dish or tray | If you miss the range |
|---|---|---|---|
| Light | 2,000–4,000 lux bright indirect; up to 4,000–6,000 lux in some stable setups | Same bright indirect light, no direct sun | Below 900 lux, growth weakens; direct sun overheats glass |
| Temperature | Stable 16–20 °C; growth possible about 15–30 °C | Same, away from heaters and cold windows | Heat spikes inside glass cook tissue; cold slows recovery |
| Humidity near the moss | High but not dripping; daily band about 50–90% | Roughly 75–96.5%, and the room will not hold it for you | Constant 100% with no air exchange favors rot |
| Watering once balanced | Often every 3–6 months; mist only when the surface dries | Check daily; mist when the surface starts to dull | Pooling water and calendar misting both fail |
| Condensation | Light fog is normal; heavy wall droplets mean open about 1 hour | No equivalent; humidity falls the moment air moves | Sealed dripping glass means you overwatered |
Practical rule: Circle one setup, closed jar or open dish, before you build. Your watering rhythm follows that choice.
A phone lux app reads rough compared with lab gear, and rough is enough to expose a dim corner. Measure where the moss will sit, at the time of day it will get the most light. If the reading comes in low, move the container or add a lamp before you blame the moss.
Choosing Moss That Tolerates Indoor Life
Choose the species before you buy the container, because the moss decides how steady your light and moisture need to be. Cushion and sheet types sold for terrariums usually adapt to a closed jar more readily than a patch lifted from deep woodland shade. Woodland moss often arrives tuned to cool, stable ground conditions you can't reproduce on a shelf.
A short buying check
- Buy cultivated stock: Pick a grower who labels the moss as cultivated, not wild-harvested, so it's already grown in conditions closer to a home setup.
- Inspect the mat: Tips should look plump and green, and the mat should sit firmly on its base. Pull back a corner and reject anything with a sour smell or a brown, mushy core.
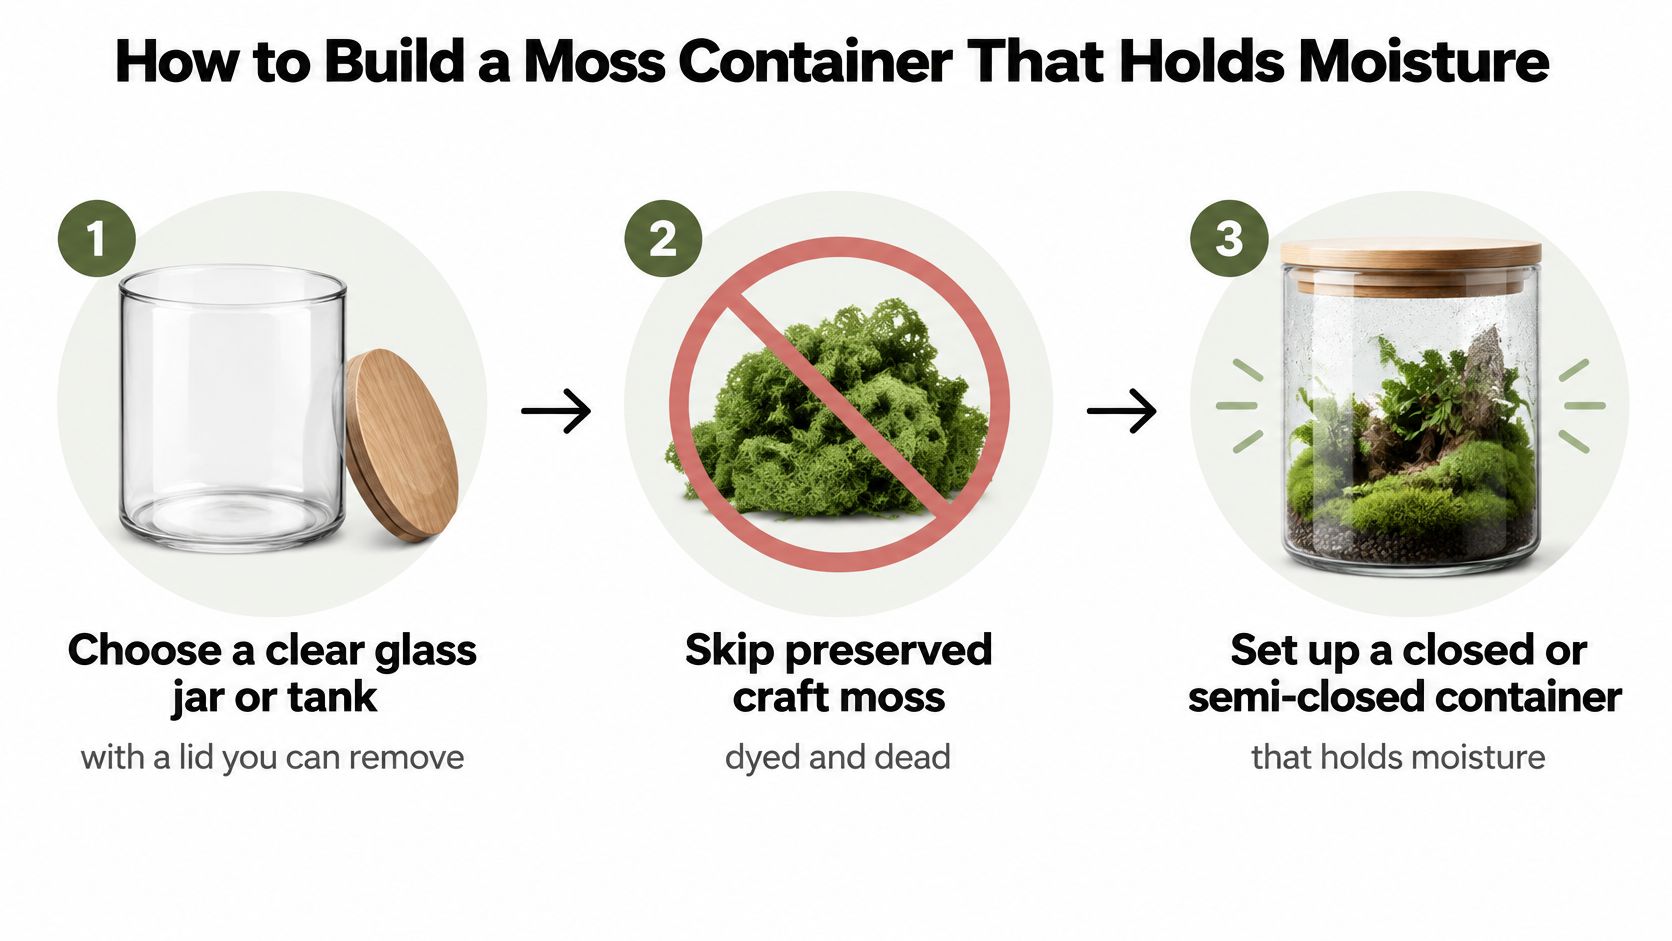
- Skip preserved craft moss: It's treated, often dyed, and dead. It can look green for a long time, but it won't grow, attach, or recover.
- Start with one species: One type in one container lets you read its response clearly. A mix hides which patch is failing and why.
Some species only hold color briefly indoors, even when your care is reasonable. That's not a reason to avoid them entirely, but it's a reason to start with a small piece and judge it by new growth later, not by how it looks in the shop.
How to Build a Moss Container That Holds Moisture
A good build does two jobs at once. It keeps humid air around the moss, and it gives excess water somewhere to go besides the base of the mat. The University of Arizona terrarium guidance reports that many closed terrariums may require watering only every 3–6 months, depending on substrate, species, light, and ambient conditions. That only works if the container starts damp, not flooded.
The sequence below shows the basic build before you add plants.
Build in this order
- Choose clear glass with a removable lid: A jar or small tank lets you see condensation and vent it quickly. The common slip is picking a sealed decorative vessel you can't open without tipping everything.
- Add a drainage layer: Spread rinsed gravel or LECA across the bottom. This creates a reservoir below the moss, so a heavy hand with water doesn't leave the mat sitting in a puddle.
- Add a barrier, then substrate: A thin piece of mesh keeps substrate from washing into the drainage layer. On top, use a clean, airy, moisture-holding substrate. Compacted garden soil holds water unevenly and can bring in weed seeds and fungus gnats.
- Pre-moisten the surface: Mist or sprinkle until the substrate feels damp all the way through, like a wrung-out cloth. If you can squeeze water out easily, it's too wet.
- Press the moss into contact: Lay living moss on the damp surface and press gently so the underside touches everywhere. Air gaps dry out first, and those patches are the ones that lift and crisp at the edges.
- Run the open-and-closed cycle: Leave the container open for approximately 24 hours, then close it for 24 hours. Repeat until condensation no longer continuously coats the glass. This bleeds off excess vapor instead of trapping it on day one.
Sealing a soaking-wet jar on the first day is the most common build error. The moss doesn't need a swamp, it needs a cycle.
Water choice matters more over months than over days. Hard tap water can leave a white mineral crust on moss and glass, so use rainwater, distilled water, or dechlorinated water when you can. Apply it as a fine mist or in small measured amounts, never as a pour.
What done looks like
You're finished when the moss sits flat on damp substrate, there's no standing water above the drainage layer, and the glass shows light fog after the lid has been on for a while. Heavy dripping at this stage means you started too wet. Go back to an open period rather than adding anything.
Inspect every few weeks after that. Add water only when the surface begins drying, and ventilate briefly if the glass stays heavily fogged or you spot pooling. Observation beats a calendar here, because two jars in the same room can dry at different rates if one sits nearer a window or a heat source.
Balance Light and the Water Cycle
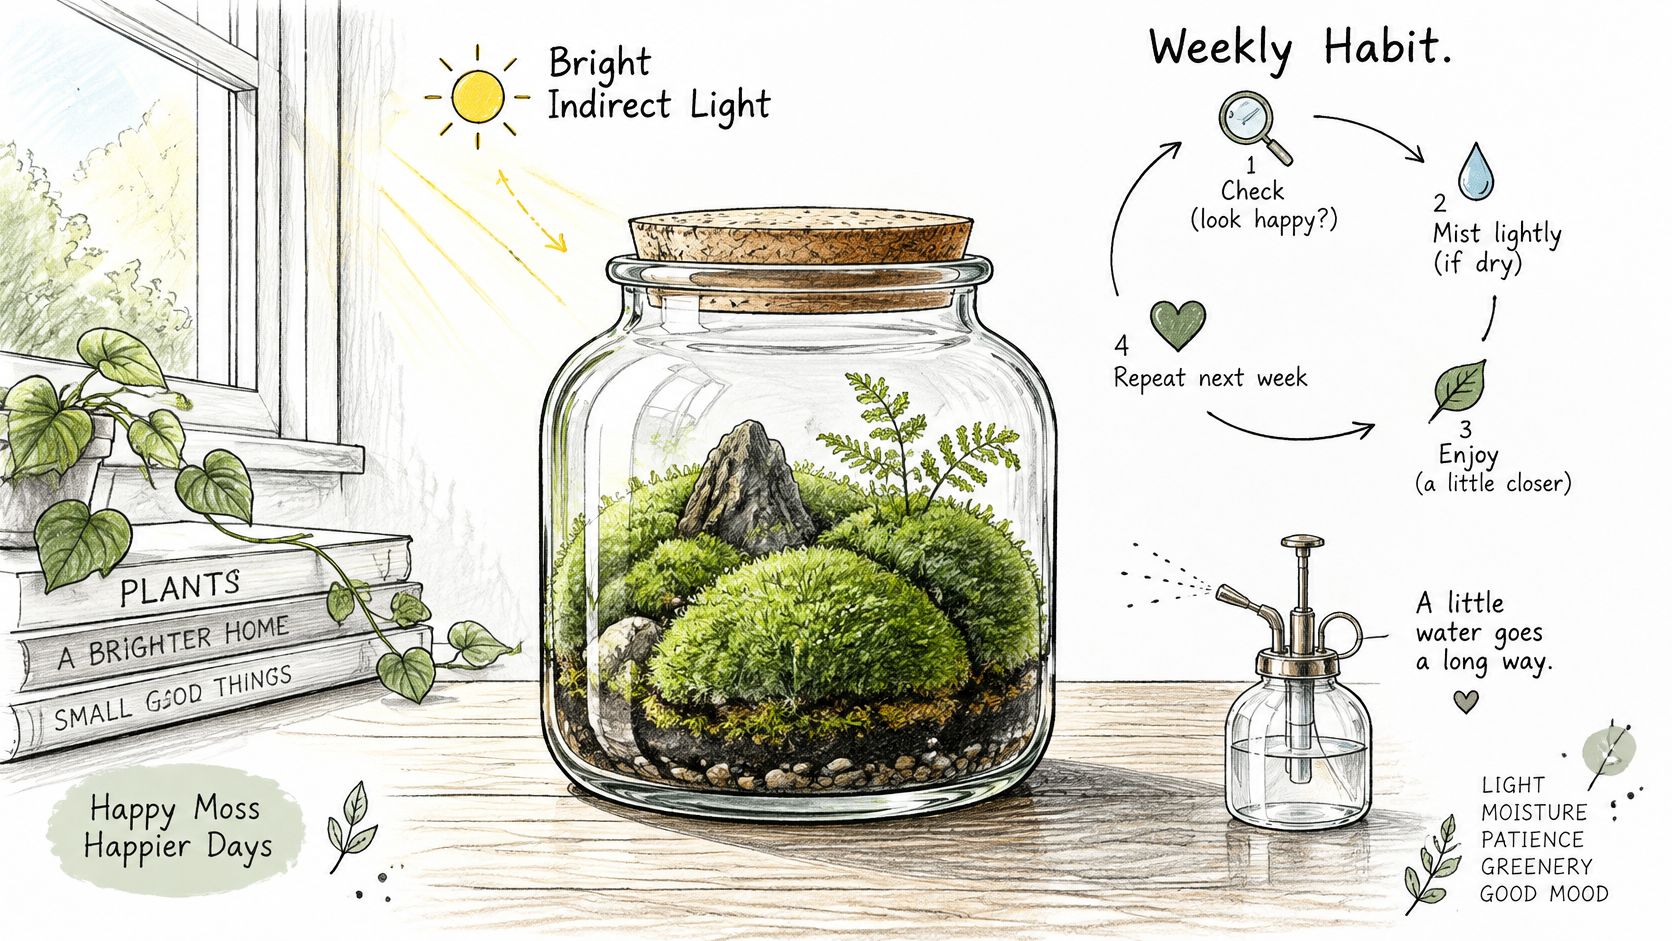
Once the opening cycle is done, run the jar on observation, not routine misting. The illustration below shows the simple weekly check most indoor keepers need.
A weekly habit that works
Place it in bright indirect light first. The Purdue University terrarium guidance recommends bright light and warns against direct sunlight, which can raise temperatures rapidly inside glass. An east window with morning sun is a classic fit. A lamp works too, as long as it's close enough to give real brightness at moss level and far enough not to warm the glass.
Read the glass before you mist. Fog on the walls is the water cycle made visible. Moisture evaporates off the substrate, condenses on the cooler glass, and works its way back down. A light haze that appears and fades through the day means the loop is running. Heavy droplets streaking the walls mean the air is saturated, so lift the lid and leave it off until the glass clears. Never add water on a dripping day.
Water only a dry surface. Judge by the substrate, not the moss. Moss can hold a green look while the layer underneath has already dried, and it can stay dull for a day after misting without needing more. When the surface has lightened and feels dry to a fingertip, add a fine mist or a few measured drops. If water pools at the bottom, tip out what's standing and vent the container until the walls stop weeping.
The video below walks through the same light and moisture checks in a real container, which helps if you're unsure what light fog should look like.
Staying green is the easy part.
Moss can coast on stored moisture for weeks while barely growing, so color alone won't tell you the jar is balanced. A sealed jar in balance recycles nearly all of its water, and the misting bottle should feel almost unnecessary. Use a concrete trigger instead of a calendar: if the glass stays clear for two or three days in a row and the surface has lost its dark damp look, that is when you mist. Keep a one-line log at each check covering fog level, surface dryness, and whether the tips look plump and slightly longer than last week. Plump, lengthening tips are the sign of real growth, and three quick notes per check will catch a slow drift toward dry long before the moss shows it.
Common Problems and How to Fix Them
Most indoor moss failures come down to two causes: too little water reaching the tissue, or too much water sitting around it. Both can start with the same dull color, so the symptom alone won't tell you which one you have. Texture and smell will. Dry moss feels crisp and closes up. Rotting moss feels soft or slimy and often smells sour. Check with a fingertip before you act, because misting a rotting patch makes it worse.
The temperature and humidity targets you set earlier still apply here. Your job now is to catch drift early, read the symptom correctly, and change one variable at a time so you know what worked.
Diagnose, then make one change
Indoor moss symptoms, causes, and fixes
| What you see | Likely cause | Change to make | Check again |
|---|---|---|---|
| Dull, brittle, then brown | Tissue dried below turgor; may be dormant rather than dead | Fine mist and a more enclosed humid spot; no pool at the base | Within a few days for plumping and reopening |
| Black, slimy, or sour patches | Prolonged saturation and poor air exchange | Remove rotten bits, drain standing water, air the container | A few days; discard if slime spreads |
| Walls dripping for days | Too much water vapor trapped | Lid off about 1 hour; do not add water | Next day; fog should stay a light haze |
| Pale or stalled, no new growth | Light too weak to reach the threshold you set earlier, or deep shade | Brighter indirect light or a lamp near 2,000–4,000 lux | 2–3 weeks for new tips |
| White fuzz on wet moss | Wetness lasted too long at mild room temperatures | Shorten misting, ventilate gently, keep substrate damp without soaking | Within a week of drier surfaces |
Moss can close, brown, or reopen quickly after misting depending on heat and dryness, so don't declare a dry patch dead on the first day. Rehydrate lightly, raise the humidity around it, and watch for tips to plump over the next few moisture cycles. Prolonged drying is different. If tissue stays crisp and breaks apart after several careful rewettings, it's unlikely to recover. And once a patch does reopen, hold off on calling it healthy. A cushion can look green for a while on stored reserves, so plump tips across several weeks are the signal to trust.
For rot, act faster. Lift out blackened pieces with tweezers so they don't sit against healthy growth. Drain pooled water, leave the lid off until the surface is only damp, and hold off on misting even if the top looks a little dull for a day or two. The goal is a clean, damp container with moving air.
If two problems show at once, fix standing water before you chase light. Rot spreads in days, while low light stalls growth over weeks.
A sealed jar trades watering chores for condensation checks, and an open dish trades stagnation for daily attention; either way, answering mold with more mist is the mistake to avoid.
Checkpoints and Your First Week
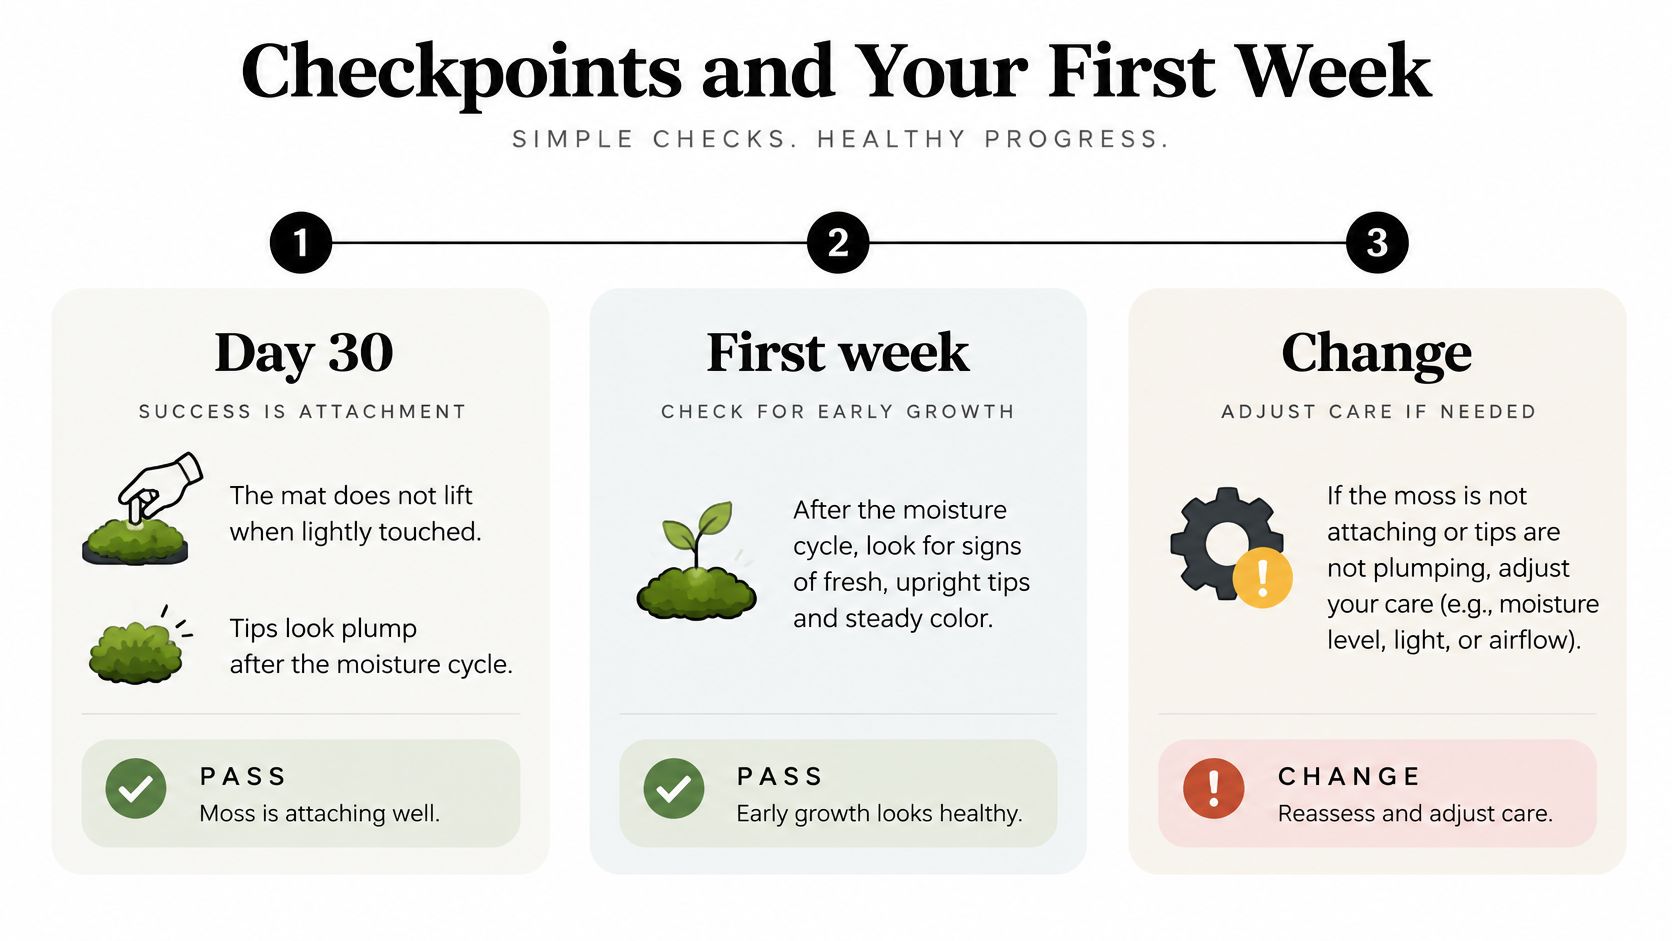
Green is a snapshot. New tips are proof. The timeline below turns that idea into three decisions you can put on a calendar.
The biology explains why patience matters. Most mosses are poikilohydric, and the Journal of Experimental Botany review of moss physiology notes that they lack the cuticle and stomata that help many vascular plants limit water loss. Photosynthetic activity declines rapidly as tissue water content falls below the level needed for full cellular turgor, although many species can temporarily suspend metabolism during drying and resume activity after rehydration. A dormant patch can therefore restart, but prolonged or severe desiccation reduces recovery and can kill tissue.
Three pass-or-change checkpoints
Day 30 is about attachment. The mat shouldn't lift when lightly touched, tips should look plump after the moisture cycle, and you shouldn't be adding water on a fixed schedule. If edges keep curling away, press them back into contact with damp substrate and check whether the spot is drying faster than the rest.
Day 90 is about new growth. Look for brighter tips at the edges or between cushions, light fog rather than daily dripping, and no sour smell when you open the lid. If the mat looks unchanged but healthy, improve light before you increase water. Stalled moss in a wet jar is rarely thirsty.
Day 180 is about spread. Measurable growth, thicker cushions, or patches knitting together means you should keep the same spot and the same sparse watering. A mat that's only hanging on as olive or brown tissue needs a decision. Replace it with a fresh piece of living moss on damp substrate in the light that already worked best. Don't try to rescue it with heavier misting.
What to do this week
Pick the case that matches your container. A new jar gets a drainage layer, the 24-hour open-and-closed cycle, and bright indirect light, with no misting until the surface dries. A drying dish gets a loose cover or a daily humidity check at moss level. A rotting jar gets ventilated and drained before you buy more moss.
Write the first checkpoint date on your calendar today. That single date changes how to keep moss alive indoors from a vague hope into a test you can pass, adjust, or restart with better information.
Ready to put your first checkpoint on the calendar and build with confidence? Moss Keeping offers practical guides to growing moss and building moss terrariums at home, with species and setup ideas you can match to your light and container. Visit us once your jar's moisture cycle is stable and choose your next build with a clearer eye.