How to Grow Moss Indoors with Measured Light
Learn how to grow moss indoors with real light, humidity, and watering ranges, plus a container setup and fixes for mold and browning.
The most popular advice for how to grow moss indoors is also the quickest way to grow mold. You're told to seal damp moss in a jar, keep it soaking wet, and tuck it into a shady corner because moss likes low light. That sounds gentle. In practice, you get a dripping container, stagnant air, fuzzy growth on the surface, and a pale mat that never spreads.
Moss doesn't need a swamp in the dark. It needs a damp surface, air that moves at least sometimes, and measured light in the low thousands of lux. Those three needs pull in opposite directions, which is why beginners get confused. Close the lid and humidity rises, but fungus gets its chance. Move the jar away from the window to avoid sun and the moss may not get enough light to stay green.
The fix isn't a stricter misting calendar. It's learning to read two simple gauges you already own. Condensation on the glass tells you when to ventilate, and a phone lux app or small meter tells you whether your bright spot is bright enough. Once you can adjust those two things, the rest becomes a short building job and a slow, patient wait for the mat to cover its surface.
Why Indoor Moss Is Not a Houseplant
Say you've got a thriving pothos and you decide moss should be easy. You pot it up, soak it on Saturday, let it dry by Thursday, and wait for it to climb or trail. Nothing much happens, except the edges turn dry and dull, because you've applied the one routine moss can't use.
Moss has no true roots and no vascular tissue such as xylem or phloem to move water from soil to tips. The University of Wisconsin-Madison Extension guidance on moss explains that it absorbs water and nutrients through its leaf-like phyllids, with movement from cell to cell largely by direct contact and osmosis, and it recommends recreating natural habitat conditions of consistent moisture, indirect light, and a suitable substrate.
That anatomy changes your next action. Don't bury moss deep in potting mix, because buried parts aren't roots and they tend to rot. Press fragments onto a shallow, damp surface instead, so the phyllids touch moisture directly.
What success looks like
You won't judge progress by height. A healthy mat stays sustained green and expands across the substrate, filling bare patches sideways. Rewet the surface before it goes bone-dry, since a dry plant body can't photosynthesize well, but don't leave standing water that blocks airflow and invites decay.
Treat moss like a living surface that drinks through its skin, not a rooted plant that drinks from below.
Indoor Conditions That Keep Moss Green
A moss container lives or fails on five measurable conditions, and most of them are already within reach in a normal room.
| Factor | Working range | What goes wrong outside it |
|---|---|---|
| Temperature | 15-30 °C; steadier target 16-20 °C | Hot glass dries the mat; cold rooms slow spread |
| Relative humidity | 50-90%; ease toward 50-60% if fungus appears | Constant saturation favors mold |
| Light | About 2,000-6,000 lux at moss height | Too little light weakens growth; direct sun overheats glass |
| Surface moisture | Damp to the touch, no standing water | Bone-dry stalls photosynthesis; a pool cuts airflow |
| Day length | 12-16 hours within tested 12/12 to 20/4 cycles | A dark corner adds up to too little light |
Treat the table as working limits; you do not need to hit every value on day one. A 2025 academic conference paper on indoor moss cultivation tested the conditions behind these ranges and documents successful growth under artificial white light at 3,175 lux. That gives you something to check tonight, at moss height, where the plant lives.
Temperature and humidity
Most lived-in rooms already sit inside the temperature range, so the container is your real risk. Glass in direct sun heats fast, dries the surface, and can cook a closed terrarium even while the room feels fine to you. The cooler, steadier end of the range is the calmer place to sit a sealed or mostly sealed box.
Humidity behaves like a dial you keep turning. Damp air keeps phyllids hydrated, and moisture management still has to leave the surface able to breathe, because constant saturation is a mold recipe. A permanently wet, sealed jar is the most common way beginners grow fuzz instead of moss. If mildew appears, let conditions drift toward the lower end of the range and give the surface time to breathe rather than misting harder.
Light and surface moisture
Low light is easy to misread, and that is where many setups fail. Moss still photosynthesizes, so it needs enough illumination across the whole day-length window, and one bright hour on the sill cannot carry it through. Aim for the low thousands of lux; a timed white LED is the easiest way to hold that level steady.
Surface moisture is the row you check by touch. The substrate should feel damp with no pooling, and the moss should look moist without sitting in water. Irrigation that waterlogs the bed trades hydration for decay, while a surface left bone-dry stalls growth until you rewet it.
A useful dose of realism
Indoor living-moss trials on wall installations have run for long stretches and tested wide swings in temperature, humidity, and daily irrigation, yet even the tougher species survived only for limited periods under those demanding conditions. A living wall is a harsher setting than your small container, so the lesson scales down rather than disappears: conservative targets matter more than enthusiasm.
Before you buy a jar, check the spot first. Read the temperature where the container will sit and the light where the moss will rest. If either sits far outside the table, move the container, because no substrate choice will rescue a hot sill or a dim corner.
Measure Light Before You Trust a Window
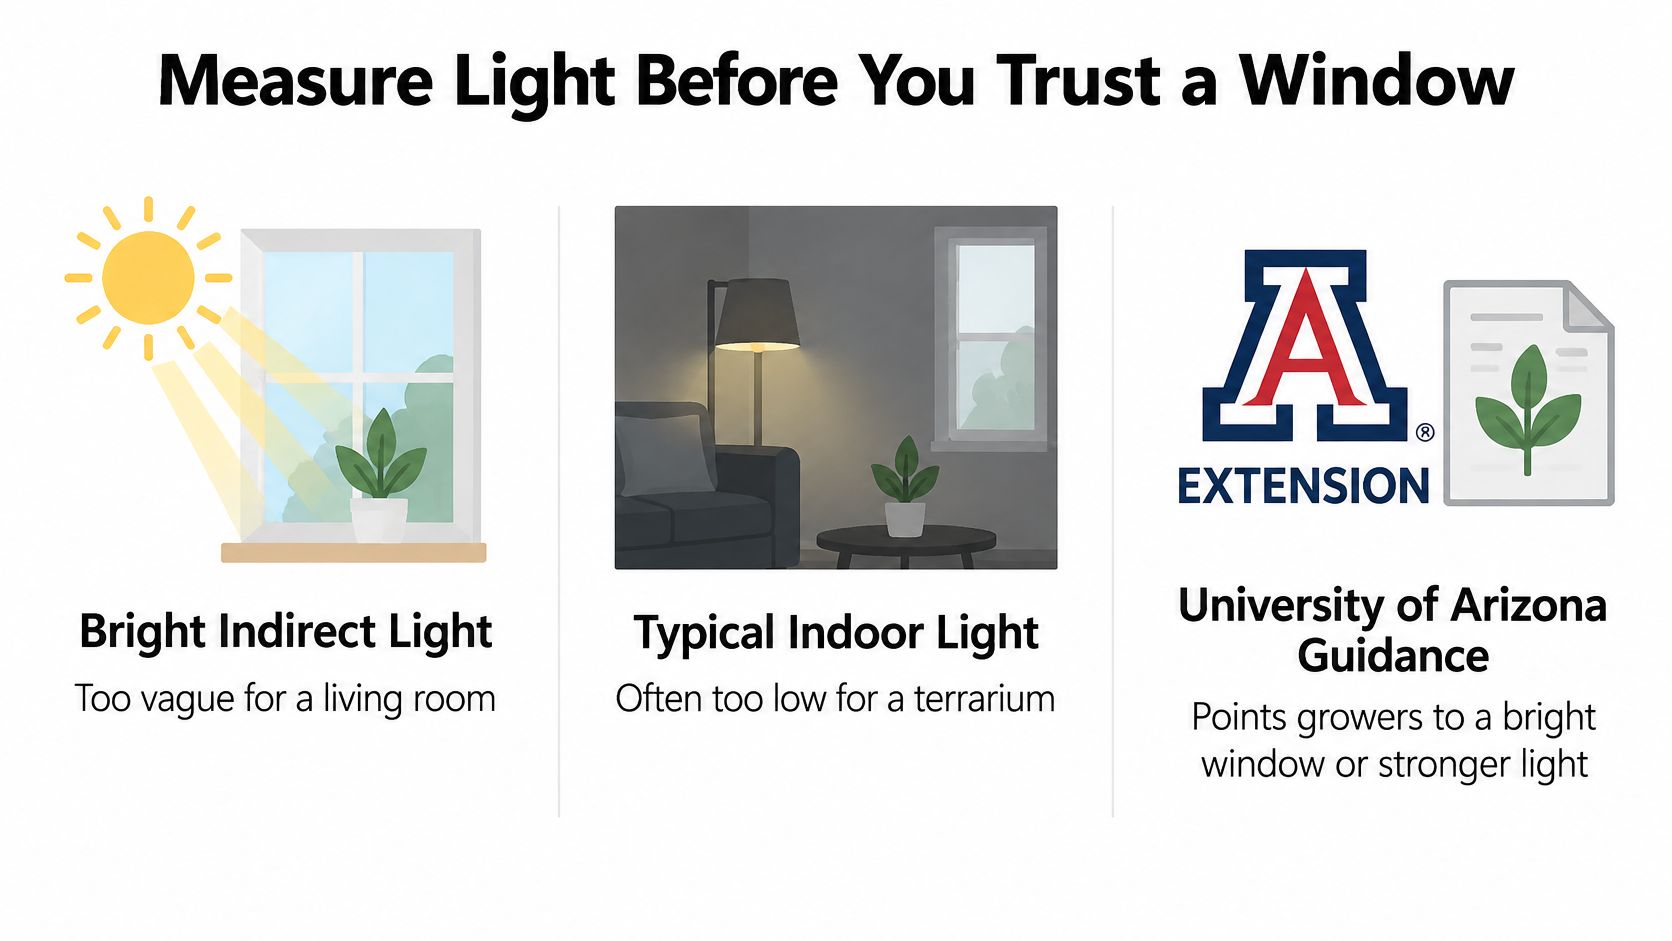
Here's the surprise most beginner advice skips. Controlled research cited in the University of Arizona extension guidance on terrarium light found that illuminance below 900 lux negatively affected growth, while levels up to 6,000 lux did not harm growth under the tested conditions. That same guidance states that typical indoor light is usually too low for terraria and recommends a bright window or artificial lighting, with standard white fluorescent and LED lamps sufficient when operated on a timer.
So bright indirect light is too vague to act on. A room that looks bright to you can be far too dim at plant height, especially a meter or two from the glass. Your eyes adjust. Moss doesn't.
A simple measuring routine
Download a free phone lux app or use a basic light meter, then hold it flat at moss height where the container will live. Take a reading in the morning and again in late afternoon, because one bright moment doesn't describe the day. Write both numbers down instead of trusting your memory.
- Start in the low thousands: Aim around 2,000 to 3,175 lux at the surface, which is a practical LED starting point.
- Adjust slowly: Move toward 4,000 to 6,000 lux only if the mat stays dull and the surface isn't drying out within a few hours.
- Keep a steady day: Run a timed lamp for 12 to 16 hours so cloudy weeks do not starve the moss.
Direct sun is the opposite failure. It can deliver plenty of light while heating the glass, crashing the humidity, and crisping the tips, so a well-lit mat can still decline. A north or east window plus a timed lamp is usually more reliable than the brightest south sill you own.
Seasons change the answer
A spot that works in June can fall short in December, because day length and sun angle shift under you. Repeat your measurements when the season turns, and if color fades after that change, add light before you add water. Extra misting won't compensate for a dark month.
Keep the lamp far enough away that the glass stays near room temperature to the touch. If the container feels warm, raise the light or move it back and remeasure, since you've just traded one problem for another.
For seven days, log three things each evening: lux, hours the light ran, and whether the green looks deeper or duller. That short record tells you more than any rule about distance from a window, and it gives you a baseline before you start changing water or lids.
Plant Moss in a Container
You can build a sound moss container in one afternoon. The steps below pair each action with its reason and the mistake that usually undoes it, so you know what to watch while your hands are busy.
The build
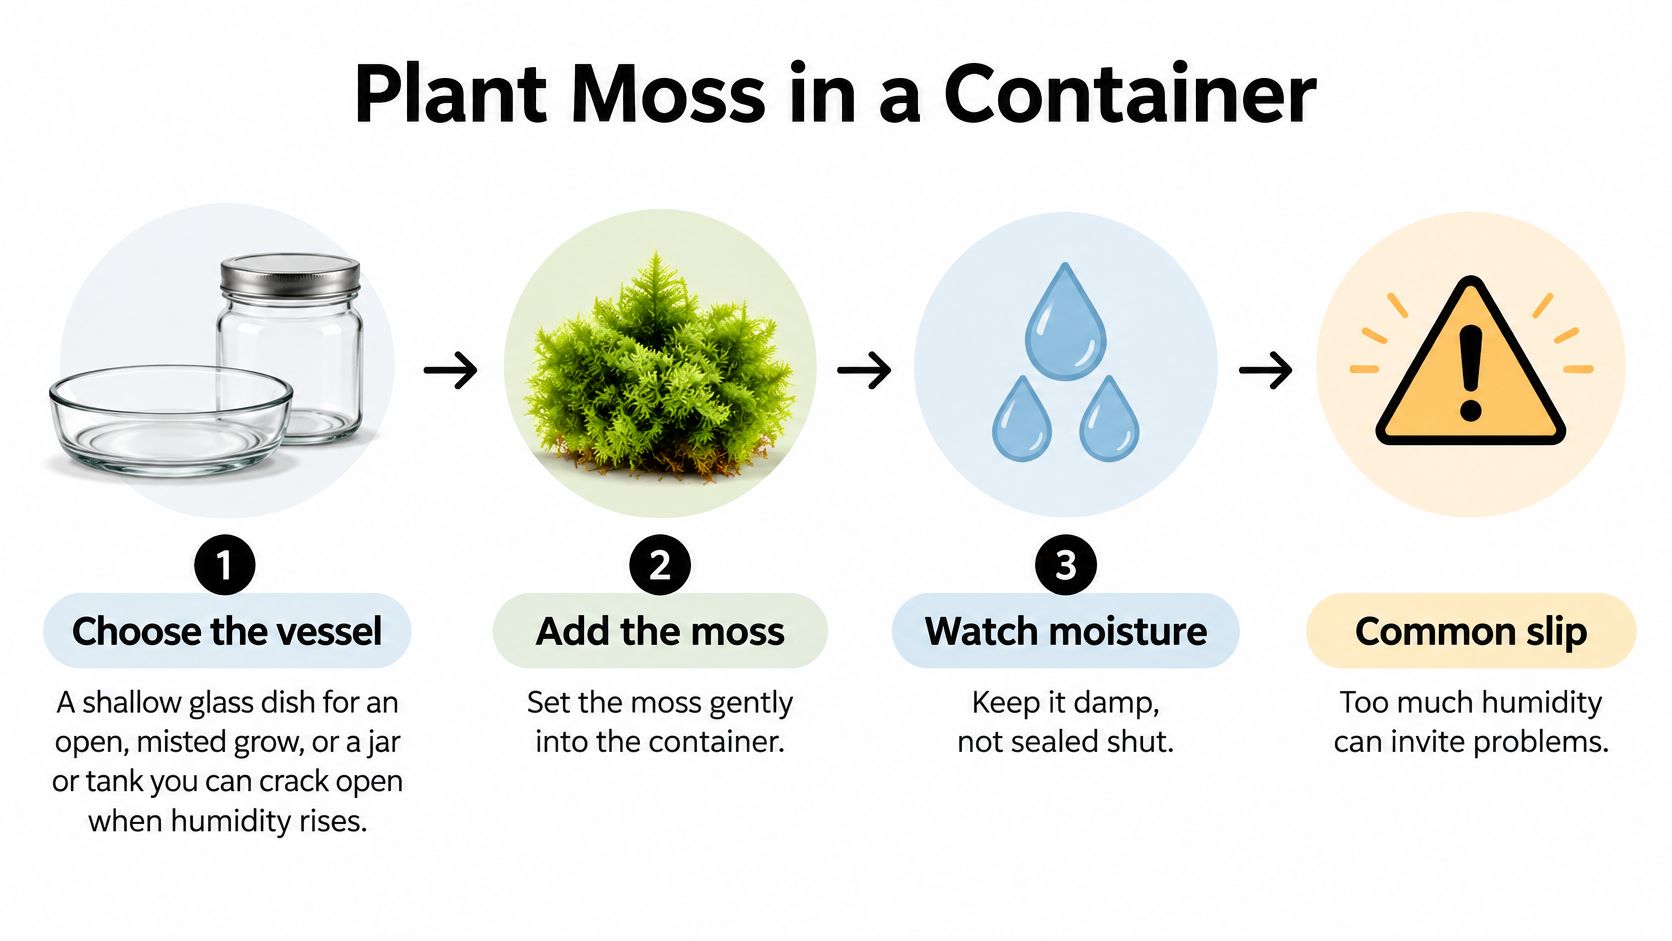
- Choose the vessel. Pick a shallow glass dish for an open, misted grow, or a jar or tank you can crack open when humidity runs high. The usual slip is choosing a deep, narrow vessel you can't reach into to clean or rearrange.
- Choose the moss. A sheet-forming type such as Hypnum cupressiforme suits a mostly closed terrarium, while a cushion type such as Ceratodon purpureus can sit on a shallow tray if you rewet it before it crisps. Buy clean cultivated moss rather than stripping wild patches, which protects local colonies and keeps hitchhikers out.
- Add drainage. Lay a thin bed of coarse gravel or pebbles, then a thin separator such as mesh so the medium doesn't sink into the stones. This layer gives excess water somewhere to go instead of pooling against the moss.
- Add a shallow substrate. Use a clean organic substrate and saturate it once before planting. Copy the dampness of a thoroughly moistened bed, not the depth of a houseplant pot.
- Place the moss. Tear it into small fragments and press them evenly onto the surface so the phyllids touch damp media. Don't bury them, because contact with the moist surface is how they take up water.
- Set the light. Run a timed cycle of 12 to 16 hours and position the container where your meter, held at moss height, reads in the low thousands of lux. Guessing from across the room is how a dim setup slips through.
- Water lightly. Mist or water gently after planting so fragments settle against the substrate. Pouring a heavy stream lifts fragments and leaves puddles you then have to fix.
The benchmark behind the method
A controlled container study on moss propagation used 150 g of organic gardening substrate at approximately pH 6 ± 1, fully humidified it with 200 mL of water, and maintained moss at 15, 20, or 25 °C under 12/12-, 16/8-, or 20/4-hour light/dark cycles, with samples irrigated weekly with 200 mL of tap water while relative humidity was held at 50%. Without fertilizer, the moss achieved more than 60% average surface coverage within 5-8 weeks. Treat that as a benchmark from controlled conditions, not a promise for your shelf, since species, water chemistry, contamination, and temperature swings at home can slow things down.
Skip fertilizer by default. The benchmark reached substantial coverage without it, and extra nutrients can favor algae or competing plants that crowd a slow-growing mat.
Measure cover, not height. Photograph the surface from the same angle each week and estimate the percentage that's green.
For the first seven days, log lux, whether the glass fogs lightly or pours with condensation, and a daily photo. Then change one variable at a time based on what the log shows. If you adjust light, water, and the lid in the same week, you'll never know which change helped.
Cycle Humidity Instead of Sealing the Jar
A fogged jar calls for a gap in the lid, and a 12-month indoor green-wall study summarized in terrarium care guidance shows why. Moss kept in warm, saturated air developed significant fungal growth during the first weeks, while the healthiest setup ran a daily swing of roughly 16-20 °C and 50-80% relative humidity at 4,000-6,000 lux, with moss surviving up to six months under the best observed combination.
Notice the word variation. Conditions moved through the day instead of pinning at saturation, and that's the habit to copy at home. A sealed jar holds one humidity reading around the clock; a cycled jar passes through wet and barely-damp every day, which keeps the moss hydrated while giving mold less standing moisture to work with.
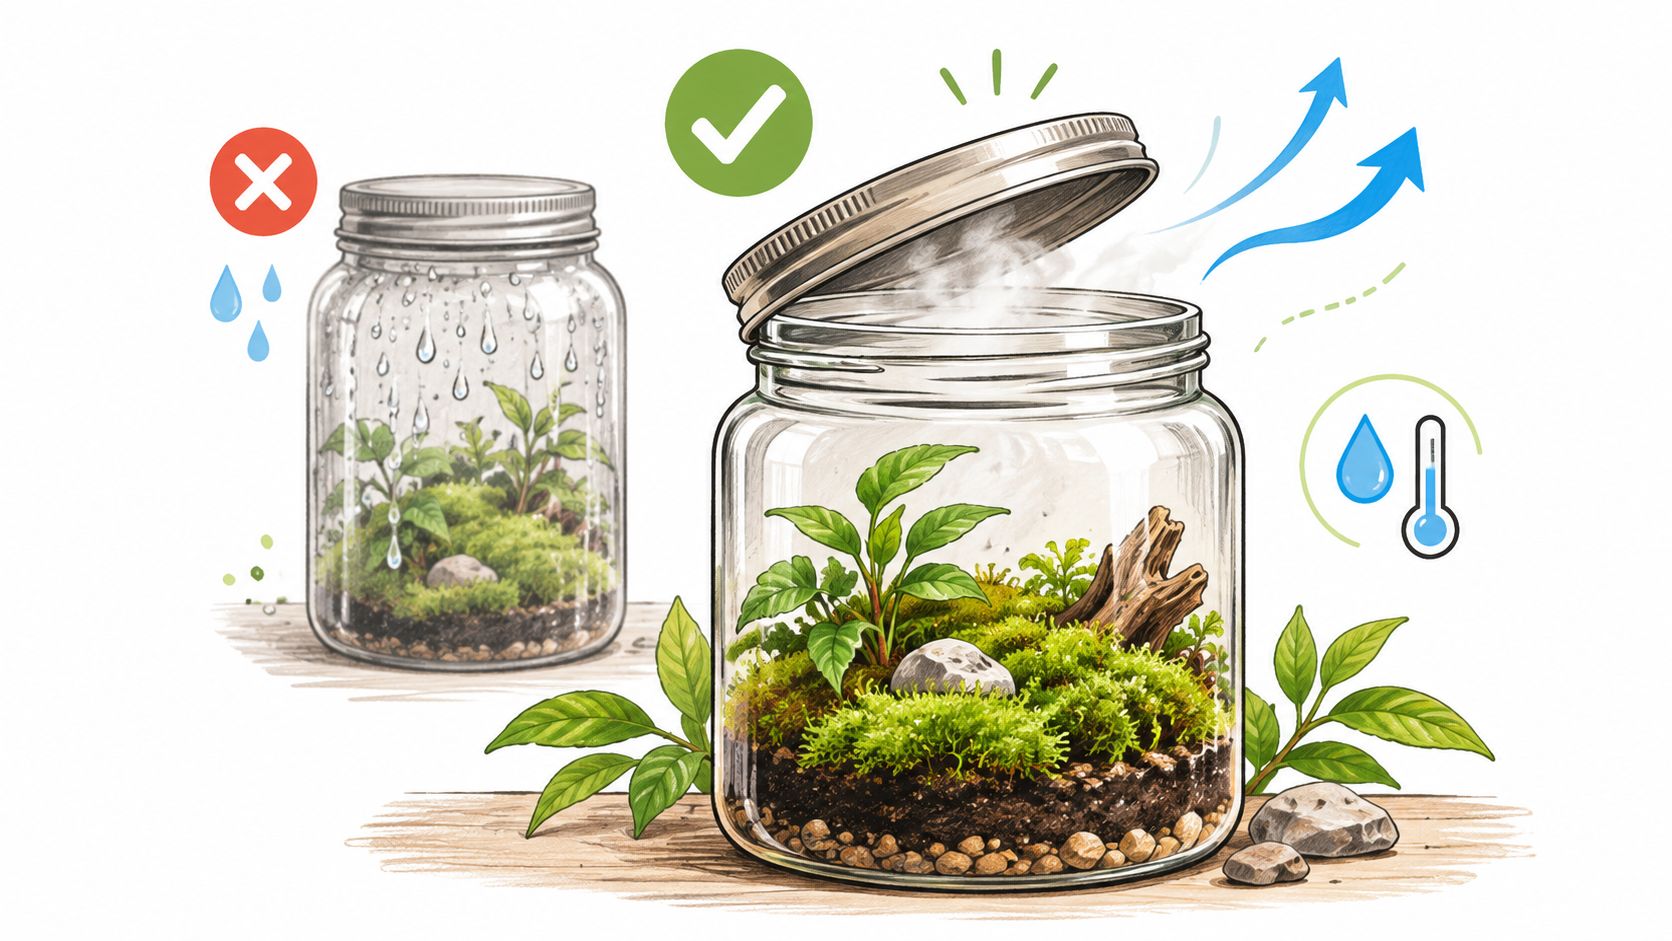
The diagram below shows the simplest version of the fix: opening the lid to release excess moisture before it becomes a problem.
How humidity cycling works
Humidity cycling means you keep moisture around the moss, then periodically exchange air so surfaces can dry slightly. Keep a closed terrarium mostly closed, but open it on a schedule or leave a small ventilation gap. Aim for damp phyllids, the tiny leaf-like flaps on each stem, with air moving across them.
A mat that goes dry for a day can green up again after rewetting. Persistent wetness is the harder problem, because it feeds mold that then competes with the moss for space. When you're unsure which error you're making, err on the side of a little more air.
Read condensation like a gauge
- Occasional light fog: Acceptable, keep watching and change nothing yet.
- Constant heavy condensation: Increase ventilation and mist less, because the air inside isn't cycling.
- Stale smell, mildew, or fuzzy growth: Open the gap wider and let surfaces dry slightly before you mist again.
- Dry substrate or crisping edges: Close the gap or mist sooner, before the mat goes bone-dry.
Mist with a fine spray rather than pouring. You want a surface that looks damp and glistens without a pool, then a top that dries slightly between sessions. The glass works as your hygrometer, so read it before you reach for the bottle.
Watch how a lid adjustment changes condensation and surface moisture in the walkthrough below before you settle on your own routine.
Heated apartments and air-conditioned rooms won't share one misting calendar, so don't copy someone else's schedule. Check the glass for two days, morning and night, and change the lid before you change the moss. If heavy condensation never clears, give the jar more air before you give it more water, whatever day of the week it is.
Fix Browning Mold and Slow Cover
Crisp brown edges are the failure most growers meet first. The mat looks fine in the middle, the tips go dry and brittle, and the instinct is to rebuild everything at once. Resist it. Match one symptom to one change, because if you open the gap and add a lamp in the same week, a recovering mat won't tell you which fix to keep. Then give the change time and keep your photo log running so you can see whether it worked.
| Symptom | Likely cause | First fix |
|---|---|---|
| Crisp brown edges | Surface dried or glass heated by sun | Mist before the mat goes bone-dry and move off direct sun |
| Pale mat, little spread after 5-8 weeks | Light below about 900 lux | Raise to 2,000-6,000 lux for 12-16 hours |
| Constant heavy condensation and mildew | Sealed, saturated air | Open a gap, mist less, ease toward 50-60% if fungus shows |
| Green film on glass or moss | Nutrients plus constant wetness | Skip fertilizer, wipe glass, reduce water |
| Yellow mushy patches | Buried moss or standing water | Press onto the surface and drain any pool |
| Stall after a season change | Winter light drop | Add a timed white LED rather than more water |
Dry and pale problems
Crisp tips usually mean the surface dried out or direct sun heated the glass. Move the vessel off the hot sill, mist earlier in the cycle, and watch the new growth rather than the damaged tips. Crisped tissue won't turn green again, so judge the fix by fresh shoots at the edges.
A pale mat with almost no new cover after several weeks usually points to light. Measure at moss height first, because a dim reading explains slow spread better than any watering theory. If the number lands in the table's low-light row, raise it into the working band and hold a steady daily cycle instead of misting extra to compensate.
A mat that thrived in summer and stalls in winter is telling the same story. Shorter, weaker days dropped your lux, so a timed lamp is the fix. Adding water to an under-lit container only raises your mold risk.
Wet problems
A permanently wet jar is the most reliable way to grow mold, and fuzzy patches mean the air inside never cycles. Open a gap, mist less, and keep the air drier until the fuzz stops spreading. Pick out visibly moldy pieces with tweezers so spores have less to spread from, and wipe the glass so you can see the moss you're judging.
A green slime film is often algae fed by fertilizer, nutrient-rich water, or constant wetness under light. Stop feeding, wipe the glass clean, and water less so the surface dries slightly between sessions. Algae on the glass is mostly cosmetic, but a thick film over the moss shades it, so keep the viewing side clear.
Yellow mushy patches usually mean the moss was buried or left sitting in a puddle. Lift those pieces, press them back onto the surface, and drain any standing water into the gravel layer or out of the dish. Mushy tissue that smells sour won't recover, so remove it and let healthy fragments colonize the gap.
How fast should a fix show
The fast wins show first. Condensation often eases within a few days of opening the gap, and a mat that was merely dry usually firms up and greens at the edges once it holds moisture again.
Coverage is slower, and that's normal. Judge spread over weeks using your photos, comparing the percentage of green surface rather than the height of any single tuft. If nothing has changed after several weeks, make the next single change from the table, starting with the cause you can measure, which is usually light.
If you're ready to put measured light and humidity cycling into practice, Moss Keeping offers practical guides to growing moss and building moss terrariums at home, from container setup to long-term care. Visit Moss Keeping to work through your first build step by step and keep your mat green through the season changes.